
Motorisation – DIY Motorised Louvred Roof System
Motorisation offers a convenient and modern solution. By automating the movement of blinds, curtains, and other window coverings, you can effortlessly control light, privacy, and ambience with the touch of a button or through a smart system.
Motor- LA23 Specification

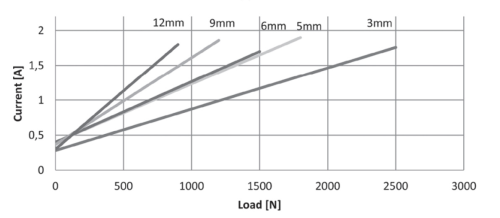
Control System
Standard Control Box
24 Volts DC power supply for one 24 Volts DC Motor (LA23) with inbuilt receiver. Vivid Motor Controller | For 1 x 24 Volts DC Motor | M-TLCO-R-CTR1M.
Specifications:

Power Supply
HLG-120H series is a 120W AC to DC power supply featuring the dual mode constant voltage and constant current output. It can operate from 100 – 240V AC and 24V DC. Vivid Power Supply IP68 | 24 Volts & 120 Watts | M-TLCO-P-120W.Use in conjunction with Motor Controller.

Power Supply
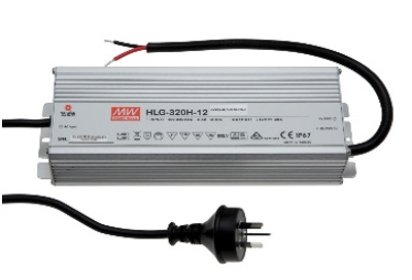
HLG-320H series is a 320W AC to DC power supply featuring the dual mode constant voltage and constant current output. It can operate from 100 – 240V AC and 24V DC. Vivid Power Supply IP68 | 24 Volts & 320 Watts | M-TLCO-P-320W.Use in conjunction with LED Dimmer.
Programming Instructions
Pairing
Step 1: Select the channel of the Remote / Transmitter that needs to be programmed.
Step 2: Press P1 Button of Controller Two Times and HOLD it on Second Press. The Controller will emit a continuous beep.
Step 3: Press any button (UP OR CENTRE OR DOWN) on Transmitter to pair with Controller. You will hear an intermittent beep to confirm pairing.
Pairing is complete.
Deleting
Deleting All Radio Codes:
Step 1: Press P1 Button of Controller Six Times and HOLD it at Sixth Press. Continue holding P1 till you hear an Intermittent Sound, and release.
Deletion is complete.
Copying Remotes
Step 1: Press once on the P3 reset button on the back of the Remote.
Step 2: Press the Top (Open) Button on the Face of the Remote.
Step-3: Press the Top (Open) Button on the new Remote or Channel. The Control Box will emit an Intermittent beep.
Copying is complete.
Limit Setting
Press P1 Button of Controller Ten Times and HOLD it at Tenth Press, and you will hear a continuous beep. While holding the P1 button, command a manoeuvre using a Memorised Transmitter or by means of the wired input. The control unit will run its limits automatically for 2 cycles. Do not interrupt the operation during this period. A 5 second continuous beep indicates the completion of limit setting.
Note: This automatic cycle can be stopped with any command. If working time is exceeded (90 s), the control unit stops and emits an intermittent sound until any button is pressed.
Accessories
A.Standard Remote
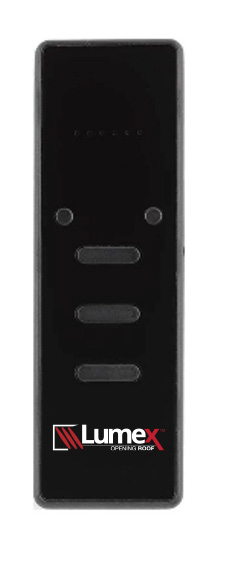
Vivid Remote | 3 Buttons 6 Channels | Handheld(M-TLCO-R-3B6C):
This type of transmitter is used for controlling Roof Systems for Domestic use, Automatic
Openings, On/ OFF Light Control, Dimming, etc. This Remote transmits a rolling code type signal
to guarantee maximum security. The transmitter code can be stored in the receiver directly by the
latter or by radio from the transmitter. With the second possibility you can add new transmitters
to an existing system without having to touch the receiver.
Technical Specifications:
B. Android / IOS Application
App Programming / Phone Set-Up:
To master the ‘How to Program DAISY Box’ skills, one must follow the instructions given below or follow this Daisy Guide.
Download and Daisy Box Installation:
Registration:
Setting up Rooms:
Creating Scenarios:
Programming Weekly Timer:
Memorisation of Daisy Commands on Receivers:
Note: Daisy must be memorised in the controlled receiver.
Remotes Memorisation of Other Radio Codes from a Transmitter to Daisy:
Share Installation (6 Hours):
This allows a second user to temporarily control the Automations and Modify the settings stores. Before starting, the second user must first download the App and register an Account.
Connecting Daisy to Google Assistant / Google Home:
Please follow this VideoLink1 for complete guide to connect Daisy with Google Assistant / Google Home.
Connecting Daisy to Amazon Alexa:
Please follow this VideoLink2 for complete guide to connect Daisy with Amazon Alexa.
LIGHTING CONTROL
VIVID LED Downlight | 4.3 Watts
Technical Specifications:
VIVID LED Silicon White Light Strip | 8 Watts per Metre | 5m & 7m
Technical Specifications:
Note: 2 Strips are used in conjunction in each Length of Profile, therefore doubling the wattage
